Sunday, May 23, 2010

Date night and White Mountain Chocolate Cupcakes

Friday night Mr. T and I went out for an over due date night. We try to spend at least one night a week "on a date" but it has been a while since we've actually left the house for one. We had a great time.
Give us some credit, it was a self portrait...

This weeks cupcake inspiration came from me wanting to try and out-do the infamous "Car Bomb Cupcakes" because they have become the basis to every other cupcake I've made. It makes me a little sad since they were the first cupcakes I made in my little challenge, and the first cupcakes I had ever made from scratch. Enter this week's cupcakes: White Mountain Chocolate Cupcakes from The Cupcake Deck I received at Christmas time. I've also made the Kid Friendly Cupakes and Apple Cinnamon Cupcakes from the same deck.
They may not be the prettiest cupcakes on the block but they were a big hit. Something about that sloppy and sweet meringue frosting gets everyone excited. According to the recipe the yield is 12 cupcakes but I, of course, ended up with 16 which turned out perfect because I was able to use all of the frosting. These cupcakes took approximately 2 hours and 15 minutes to complete from the time I took the first ingredients out of the 'fridge to popping the lid on top of my new cupcake carrier.

Cupcake Ingredients:
3 ounces unsweetened chocolate, chopped
1 cup unbleached all purpose flour (side note- I always use unbleached flour)
1/2 tsp baking powder
1/2 tsp baking soda
1/4 tsp salt
1/2 cup unsalted butter, at room temperature (1 stick)
1 1/4 cups sugar
2 large eggs (worm fed are the best. Thanks to my sis-in-law Jenni for the eggs)
1 tsp vanilla extract
1/2 cup sour cream
1/2 cup water

Position rack in the middle of the oven. Preaheat the oven to 350F. Line 12 (or 16) muffin tin cups with paper cupcake liners.

Put the chocolate in a heatproof bowl over the top of a double boiler and place it over, but not touching, a saucepan of barely simmering water or the bottom of a double boiler. Stir until the chocolate is melted and smoot. Remove from the water and set aside to cool slightly.
Sift the flour, baking powder, baking soda, and salt into a medium bowl and set aside.
In a large bowl, using an electric mixer on medium speed, beat the butter and sugar until smoothly blended and creamy, about 2 minutes. Stop the mixer and scrape the sides of the bowl as needed during mixing. On low speed, mix in the melted chocolate. On medium speed, add the eggs one at a time, mixing until each is blended into the batter. Add the vanilla and beat until the mixture looks creamy, about 1 minute. Mix in the sour cream until no white streaks remain. On low speed, add half the flour mixture, mixing just to incorporate it. Mix in the water. Mix in the remaining flour mixture until it is incorporated and the batter looks smooth.

Fill each paper liner with a generous 1/3 cup of batter, to about 1/8 inch below the top of the liner. (please note that I followed this direction exactly and still ended up with 16 cupcakes.) Bake just until the top feels firm and a toothpick inserted into the center comes out clean, about 20 minutes. Cool the cupcakes for 10 minutes in the pan on a wire rack. Remove the cupcakes from the pan onto a wire rack and let cool completely.

Seven-Minute Frosting (or fifteen....)
1 1/4 cups sugar
1/3 cup water
3 large egg whites
1/4 tsp cream of tartar
1 tsp vanilla extract
1/4 tsp almond extract

Put the sugar, water, egg whites, and cream of tartar in a heatproof bowl or the top of a double boiler with at least a 2 quart capacity and beat with a handheld electric mixer on high speed until opaque, white, and foamy, about 1 minute.
Put the bowl over, but not touching, a saucepan of barely simmering water or the bottom of a double boiler. The top container should sit firmly over the pan of hot water; be sure to keep the cord of the electric mixer away from the burner. Beat on high speed until the frosting forms a soft peak that stands straight up if you stop the beaters and lift them up, about 7 minutes. This is the part that took me about 14 minutes. The frosting should register 160F on a thermometer (at 7 minutes mine was only at 120F and there were no peaks, so I kept going).
Remove the container of frosting from the water, add the vanilla and almond extracts, and continue beating for 2 minutes to further thicken the frosting. A word of device- don't drool into your meringue during this stage, because this is the part that starts getting really delicious. Don't worry, I didn't.
Use a small spatula to spread a thick layer of frosting, about 1/2 cup, over the top of each cupcake, dipping the spatula gently into the frosting to make swirls. Serve the cupcakes, or carefully cover them and refrigerate. Let sit at room temperature for about 20 minutes before serving.
Then give them to your friends (or co-workers as the case may be) and get a free drink at the bar.
Where's Emily?
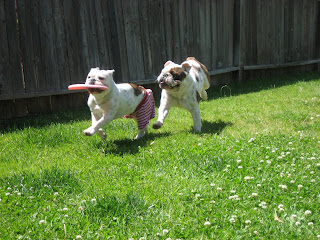
And Bretta? She's healing up okay. Just a couple more days until those stitches come out and she'll be ready to chase the tennis ball again.

Anniversary cupcakes: Mocha Chip Cupcakes with Chocolate-Sour Cream Frosting

This past Monday (May 17) was Mr. T and I's second anniversary. This year we decided that we wanted to spend the night in and make dinner together. Mr. T decided on dinner (delicious Steak Pizzaola from Rachel Ray's 30 minute meals, mmmm) and I made dessert. In our house nothing says I love you like chocolate and I figured triple chocolate would really get my point across.
Mocha Chip Cupcakes with Chocolate-Sour Cream Frosting
This recipe is yet another from Fine Cooking's Sweet Cakes (you may remember them from here and here) the recipe for the cupcakes and frosting is available here.
This is the frosting, with the cupcakes still in the pan. Yum.
I followed the recipe exactly, with the exception of mistakenly using bittersweet chocolate instead of unsweetened chocolate for the sour cream frosting. Mr. T and I still thought they tasted amazing.
This recipe claims to yield 12 cupcakes, fortunately for us it was more like 16 :) I was not disappointed.
My friend Mrs. A, link to her blog here, has agreed to be a guest taste tester for this recipe so we shipped her 4 cupcakes and you will see her review in the comments below. Thanks Mrs. A!

On another note, our mascot has been out of commission for the last week. Mr. T and I made the very tough decision to have our first born spayed last week and she has spent all of the time since partially tranquilized and in a cone. We've had lots of quiet days and cuddles here at Chez Bretta.
You'll notice the pillow and tissues stationed next to Bretta's sick bed so that this puppy parent could lay next to her and be just as pitiful more pitiful than she was. Good thing Mr. T is very understanding.

xoxo Mrs. T

Saturday, May 22, 2010

Paula Deen's Red Velvet Cupcakes with Cream Cheese Frosting

A co-worker brought in leftover cupcakes from her daughter's first birthday and I couldn't stop thinking about Red Velvet and Cream cheese frosting. I went internet searching and hit pay dirt when I found Paula Deen's recipe on the Food Network website, link here. I read through the comments and took note not to use as much vegetable oil and made a few other adjustments as I went along. The following is the recipe for the cupcakes that I used.
  • 2 1/2 cups all-purpose flour
  • 1 1/2 cups sugar
  • 1 teaspoon baking soda
  • 1 teaspoon salt
  • 3 teaspoons cocoa powder
  • 1 cup vegetable oil
  • 1 cup buttermilk, room temperature
  • 2 large eggs, room temperature
  • 2 tablespoons food coloring, one red and one pink (since I didn't have as much red as I thought)
  • 1 teaspoon white distilled vinegar
  • 1 teaspoon vanilla extract
You'll notice that I tripled the cocoa powder that Paula calls for because I felt like I could taste the vinegar and wanted to make sure that no one else could. The reviews were all very positive and I like how they turned out. I followed the directions given on her site exactly with my modified portions.
The comments on her site advised to cut the frosting recipe in half, as did a fellow blogger LLL. So I did, and thank God because I still had extra frosting after being very generous with the cupcakes.
This recipe took about an hour and a half from start to finish because I only put one batch of cupcakes into the oven at a time and I cam out with an even 24 cupcakes (there's a first time for everything right?)
The result- even Mr. T enjoyed them (probably more than he enjoyed me photographing his consumption):


We also had a visitor over the weekend of May 8 and 9. Bretta's brother and litter mate, Slim, came to stay with us while his Mom and Dad went wine tasting for their anniversary. We had a lot of fun and considered telling his parents that he ran away so that we could keep him... But then we thought about how sad that would make us and didn't do it. It was so fun to see that they do everything identically. From the way they drink and sniff to the way they beg for attention.

Thursday, May 20, 2010

Champagne Cupcakes with Strawberry Buttercream Icing


On May 1st my Hetero-Life-Mate (BFF for those of you that don't know Jay and Silent Bob) graduated from college. Since it was such a special occasion, and I needed to make something that was portable, I asked if I could make some fancy cupcakes. Now don't get too excited, fancy doesn't mean pretty, fancy just means fancier ingredients. So what did I make?
A combination I thought of myself. It seems like a really obvious one, but I googled and did not find many links.
I give you:
Champagne Cupcakes with Strawberry Buttercream Frosting
(why do I always want to say Champagne wishes and Caviar dreams instead?)
I found the the Champagne cupcake recipe at All Recipes link here
I read the comments and made a few adjustments, I think they turned out pretty well. This recipe makes 26 cupcakes. Two of them may be a little smaller than the others.

Ingredients:
  • 2 3/4 cups all-purpose flour
  • 3 teaspoons baking powder
  • 1 teaspoon salt
  • 2/3 cup butter
  • 1 1/2 cups white sugar
  • 1 1/2 cups champagne (I used pink but the cupcakes still came out a creamy color)
  • 6 egg whites 
Directions  
  1. Preheat oven to 350 degrees F (175 degrees C). Line each cup of a muffin tin with paper baking cups. Preferably cute ones ;)
  2. In a large bowl, cream together butter and sugar until very light and fluffy. Sift flour, baking powder, and salt together, and then blend into creamed mixture alternately with champagne.
  3. In a large clean bowl, beat egg whites until stiff peaks form. Fold 1/3 of the whites into batter to lighten it, then fold in remaining egg whites. Pour into prepared pan.
  4. Bake at 350 degrees F (175 degrees C) for 20 to 25 minutes, or until a toothpick inserted into a cupcake comes out clean. 
Mid-baking realize that you haven't taken any photos yet and search for your camera. Once you find the camera, check the battery only to discover that you haven't charged it for a while and it is getting pretty low. Consider your options: lovely step by step amateur photos of your latest baking adventure or proof that you were present at a major life event of one of your closest friends. Choose the latter, plug the battery in to the charger and get back to those cupcakes you promised her. 


For the frosting I chose a basic buttercream because it's simple and delicious. The best part about buttercream is that it tastes amazing yet only requires about three ingredients, and that's only if you want it to be flavored.
To make the frosting I used 2 sticks of room temperature butter, creamed it until fluffy and added in 2.5 cups of powdered sugar slowly. I added 3 tablespoons of strawberry preserves and mixed until combined. I put all of the frosting into a 1/2 gallon ziploc, cut off the end and frosted the cupcakes.
I chose this picture so that you could see how well the frosting held up in 80 degree weather.
And because she makes such pretty faces.

Congratulations Hetero Life Mate, I'm very proud.

Because my HLM hails from my hometown I was able to stop by and see one extra special guy. He's really been working on improving his life lately and I'm really happy for him. He's dropped about 20 pounds since I saw him in November and you can see that it has changed him. He has more energy than he has in years and greeted me so enthusiastically I barely recognized him. He's a little camera shy but he did give me permission to post his picture if it didn't show his face.
Looking good Jasper!

And we all know a post wouldn't be complete without some of our regularly scheduled puppy love.
This is B "watching" a movie with me on the couch.
At least one of us was comfortable.

Tuesday, May 4, 2010

Individual Coffee Cakes

Let me start by saying that this was one intimidating recipe. I was faced with the reality of my 3.5 feet of usable counter space, lack of awesome marble pastry board (like this one from Williams-Sonoma) and sheer laziness when it comes to multiple steps. I like to keep my fabulousness simple. Did I mention that this recipe requires two days to complete? Definitely not my style. But my head was filled with thoughts of replicating my own favorite coffee cake (or danish), and I was sucked in. I would like to say that my own favorite is super exclusive and only available in this little teeny boulangerie in Paris but it's not because it's this:
Entenmann's Raspberry Danish
If you haven't had an Entenmann's Raspberry Danish, get down to the closest grocery store you can and buy one. You won't find it at Whole Foods. At this point I would like to say that after making my own I will never be going back to the blue box that is probably filled with 1,000 grams of toxic waste (You'll have to look into the nutritional information yourself, this blogger is too lazy to offer sound reporting at this point) but I can't. I love that little blue box and even if it really isn't coffee cake, that's the kind of coffee cake I like.
Now after that monologue I should probably clarify that I am not saying that these were not delicious, because they were. You'll just have to try them for yourself. So without further ado:
Individual Cinnamon Coffee Cakes with Chocolate-Cherry-Almond Swirl from Fine Cooking's "Sweet Cakes" magazine- link to recipe here 
I didn't use any substitutions for this recipe, except that instead of chopping everything in a food processor I chopped it in my Braun hand chopper (like this one available on Amazon) because that's what I have. I did the chopping in two stages since there was more than my little bowl could handle. Here's the not-quite finished product:


The only time adjustment was that instead of overnight the dough ended up being in the 'fridge for 2 nights, and was fine. Since I have tile counters with divots deep enough for a chocolate chip I taped down wax paper to roll the dough out onto, something I will definitely be doing for future baking projects.

Lesson: the dough gets VERY sticky VERY fast, even if your husband is the one taking the pictures. The shot above is prior to cutting the individual rolls.
Well my hand's were clean....

This would be Bretta's opinion of me spending my evenings baking, she gets as far away from me as she can. It's my punishment. Sorry for the zombie eyes...